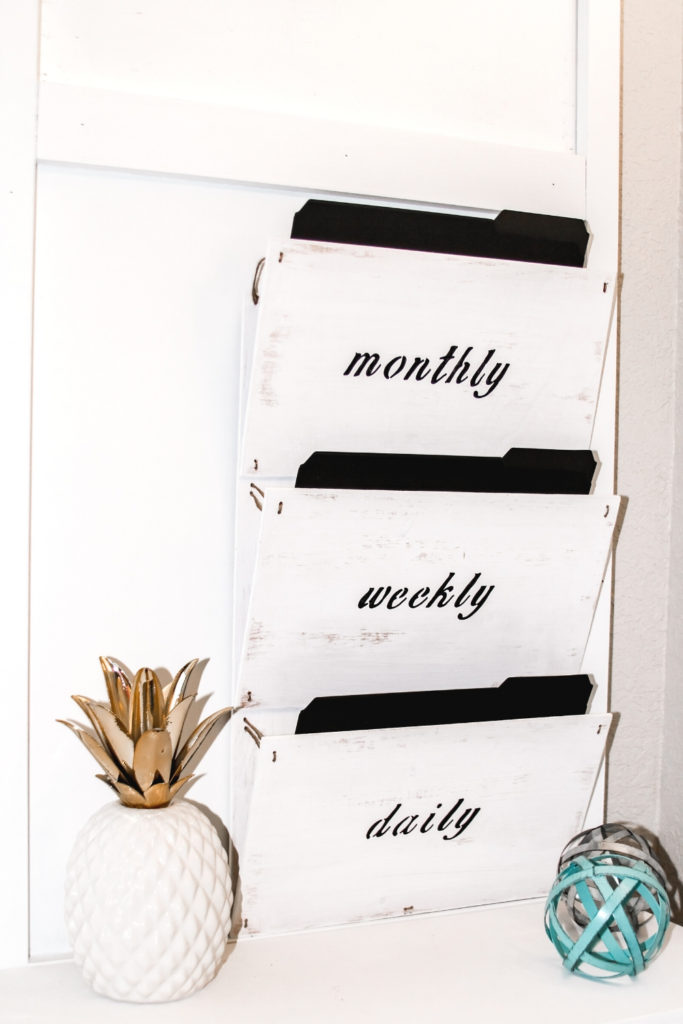
Every home has a dumping ground for bills, incoming mail, and just stuff! Make this DIY wall mounted file organizer to help eliminate that hot mess lying around your kitchen counters, dining table, and desk.
Let me explain, I have been an organizing ninja the past few weeks. I’ve had spreadsheets and paperwork in the kitchen, on my desk, here and there.
It has been an enormous distraction. If you’re like me, I can’t concentrate or get any work done in a cluttered mess.
You, too?
Here’s the deal, enough is enough!
I could have easily clicked and purchased a file organizer on AMAZON, but nope, not for this one!
Like I mentioned before, if I don’t feel I can make it, I’ll buy it!
Plus, I love it when I can save my pennies!

The best part about making this myself is that I can customize it. I can choose any color, any theme, how big, small, you name it, make it however you want.
My office theme right now is Industrial Farmhouse with a smidge of girlie glam. Is that even such a thing?
Some may call it eclectic, be that as it may! It’s my groove right now. 🙂
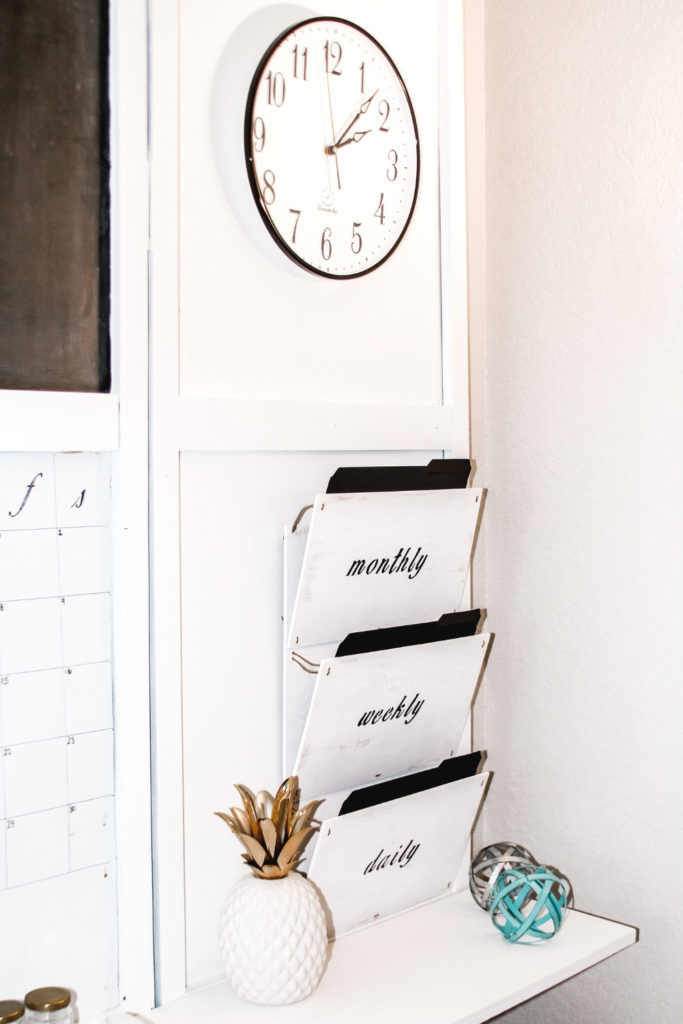
The Bottom line, this DIY wall mounted file organizer is what I needed. I have my hot mess sorted into daily, weekly, and monthly!
And, it took me just under two hours to make! And, the file organizer is my style, right now and I love it!
It’s simple and sturdy and looks great, too!
Are you ready to make your DIY wall mounted file organizer?
Decide your color theme, gather your tools, and let’s get started!

Before we get started. Have you signed up for post updates yet?
If you like this post, don’t miss out on other ones to come!
It’s easy, just fill out the form below to join the others to stay up to date! 🙂
DIY WALL MOUNTED FILE ORGANIZER
I had scrap wood lying around and the other supplies I already had. Ultimately, this project cost me nada! Win, win!
When completed, this file organizer stands at 24 1/4 tall 14 inches wide.
* Use common sense. Remember, Safety first! This post includes painting and the use of power tools. Please use caution and use PPE’s [Personal Protection Equipment] when necessary!
*TIP* If you want your file organizer to look exactly like this one, do not use spray paint.
SUPPLIES
- Pre-cut 1/8 inch thickness plywood.
- Plywood Measurements: One-Backing; 22 1/4 X 14 inches, Three-Pockets: 8 X 14 inches
- Dremel Saw
- 15, 10-inch pieces of Natural Jute Yarn or any yarn
- Scissors
- White Paint
- Paintbrush
- Electric drill with 1/8 drill bit
- Sanding sponge
- Toothpick
- 6 Paper clips
- Black marker
- Alphabet stencils
- Ruler or measuring tape
- Glue
- Hanging bracket
- *Safety Glasses
- *Mask
- *Gloves
STEP 1-4

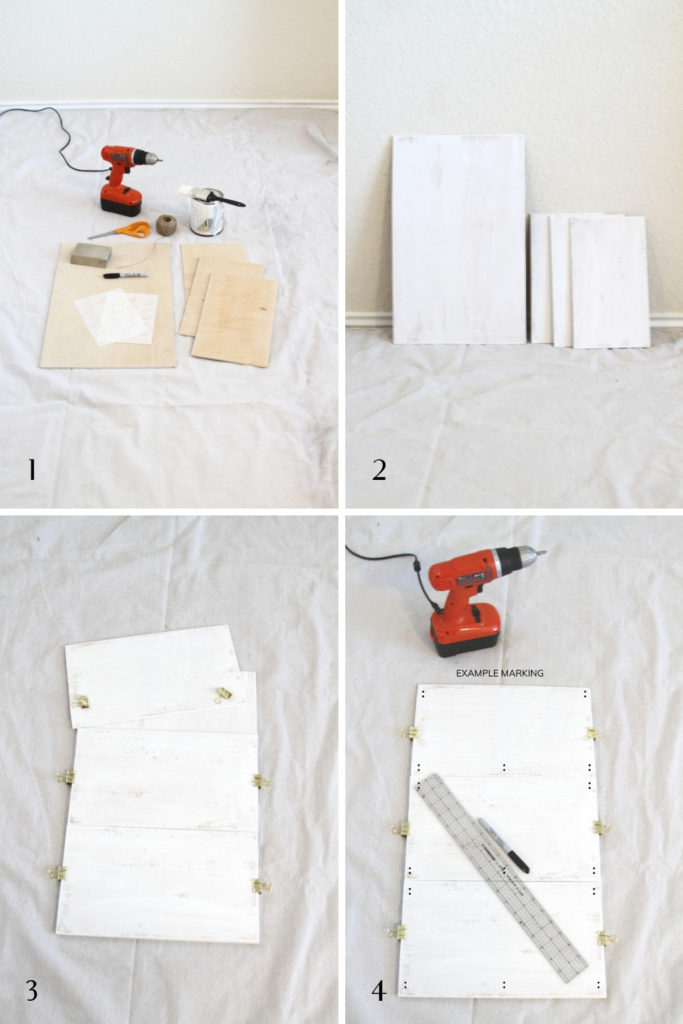
STEP 1: Gather and prep all of your supplies.
Pre-cut your pieces to size and sand all of the edges using the sanding sponge. Then, wipe clean your wood pieces and ensure they are free of dust.
Step 2: Paint the backing’s front and front and back of the three pockets.
The backing and pockets have one coat of paint. To get this look, I dipped the paintbrush into the paint and painted the wood using soft strokes from left to right, being careful not to saturate the wood completely. Set aside to dry.
As you can see, I left some spots untouched. This technique is sometimes called a whitewash or German smear.
Step 3: See image #3.
Now, starting with the bottom pocket, place it on top of the front of the backing and clip it with a paper clip on each side to hold in place.
Repeat with the middle pocket and the top pocket. The top pocket will over-hang the backing by a couple of inches. Don’t worry! You’re on the right track! 🙂
Step 4: Measure and mark the holes of the file organizer. See image #4.
Mark two hole placements vertically about a half-inch away from the edges in each corner of the pockets and center. Notice there are no holes in the top center of the top pockets!
STEP 5-8

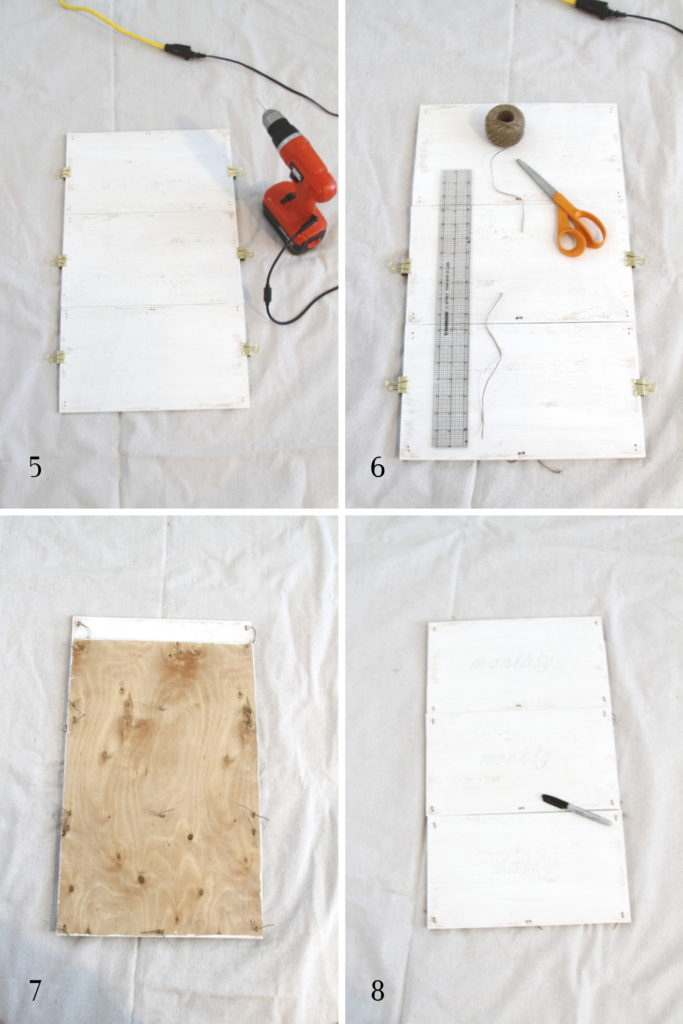
STEP 5: Drill holes through your hole markings. [Sorry, my image #5 is upside down]
Now, remove the clips and the top pocket from the backing.
Mark your placement of the holes for the two top corners of the backing and drill the holes. Replace the top pocket and clips to the backing lining up the bottom holes.
STEP 6: Assemble the pockets to the backing with the jute or yarn.
If you have trouble stringing the jute or yarn through the holes, using a toothpick helps.
Starting with the bottom pocket, guide the end of the one 10-inch piece of yarn or jute through the two bottom holes in the front of the backing. Tie the free ends of the jute or yarn in the back of the backing with 3 tight knots.
Repeat with each bottom corner and bottom center holes.
Now assemble the top of the pockets. String your jute or yarn as before, open the pockets about two to three inches, then tie three knots in the back of the backing.
Repeat the same step with each top corner of the remaining pockets.
STEP 7: Ensure each knot is tight once again. Dab a small amount of glue to each knot to ensure the knot will not become loose later on. Let dry.
STEP 8: Label your pockets with stencils and a black marker, or not. It’s all up to you.
I labeled mine for daily, weekly, and monthly for my tasks. What are you going to label yours?
All that’s left to do is attach a bracket to your new DIY wall mounted file organizer and get to organizing your hot mess!

TAKEAWAY
To sum it up, I started out with a hot mess of paperwork scattering my kitchen counters and table. I had my mountain of daily spreadsheets covering my desk.
I was so distracted and couldn’t get any work done! Instead of purchasing just any file organizer, I decided to make one!
It took me less than two hours to make and I love the end results of my DIY wall mounted file organizer!
I love that it is customized to match my office theme and I was able to save my pennies, instead of purchasing one. Win, win, win!
What do you think, will you make your own DIY wall mounted file organizer? What colors will you choose?
I’d love to hear your thoughts. Let me know in the comments below! Don’t forget to share, PIN, and tag a photo to #makesandmunchies on Instagram. I’d love to see your results!

