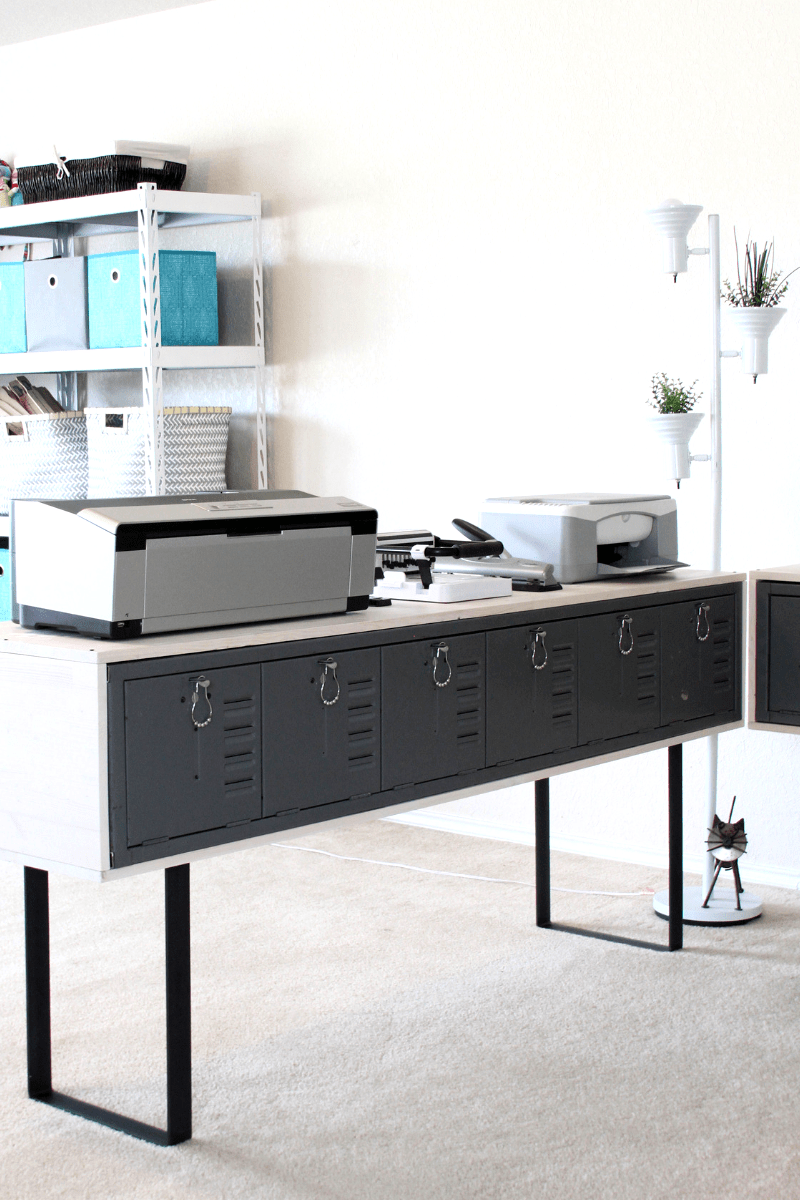
For the longest time, I’ve been wanting to do a metal locker makeover. Especially, now that this blog keeps me busy, it’s best that I stay organized and on top of things.
Whenever inspiration hits I want my studio to be ready for what may come. I don’t know about you, but I have the most inspiration when my workspace is clean and organized.
My plan is to incorporate these metal lockers in my studio. Having a blog, I’ve collected many supplies and whatnots, that I’ve run out of space for everything!
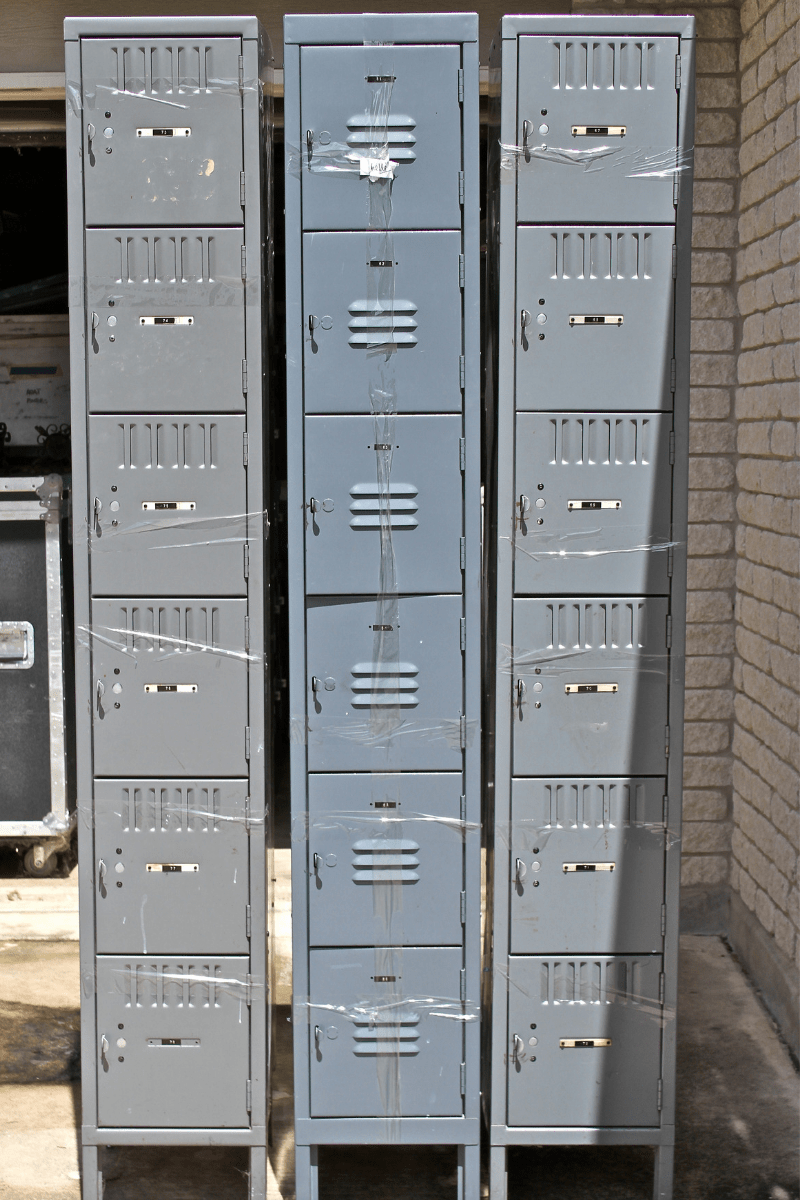
A couple of years ago I purchased these lockers from my place of work for $25.00.
I know, can you believe it?! 🙂 It was a steal! 🙂
They are pretty old but in good condition. They just needed a little bit of love and a little bit of creativity to make them beautiful.
For this metal locker, makeover I thought about painting them but decided to keep them as is. So, instead, I’m going for the industrial modern look.

I’ve always liked the modern desk or workstation that is encased with wood. I encased three sets of lockers with wood and made an “L” shaped workstation out of two of them.
The nice thing about this project is, the metal lockers are individually encased with wood and they can pretty much be anything you want them to be.
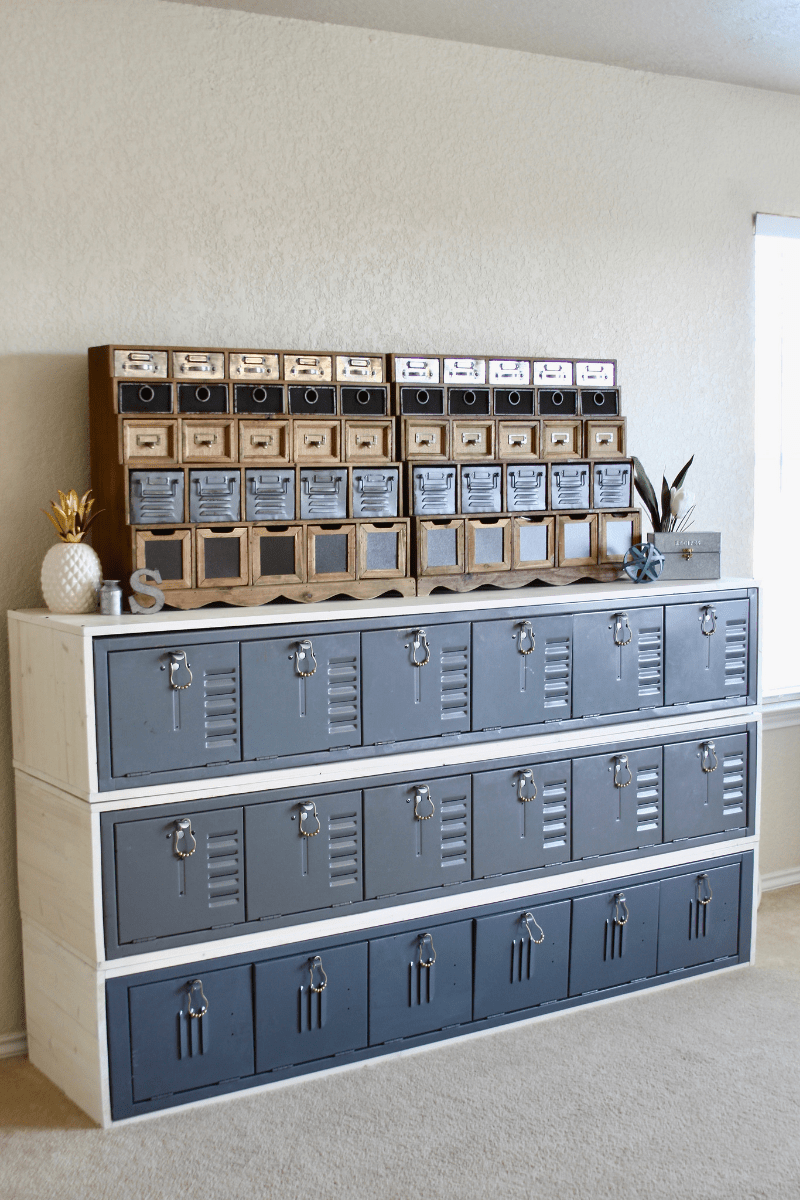
The metal lockers can be a stand-alone desk, a bench, or a storage center, shown above. The possibilities are endless!
Additionally, I have another set of lockers just waiting to be upcycled too. If you like this Metal Locker Makeover, stay tuned for another locker makeover coming up really soon!
Better yet, subscribe to post updates so you won’t miss any new posts. Subscribe here or fill out the form below.
Without further ado, let’s get started!
Safety First! Always remember to use common sense before starting any project. Use, safety glasses, gloves, and a face mask when necessary!
SUPPLIES
Since we made multiple lockers, the list below is what we used for one locker:
- 1 set of lockers
- 2 sanded Pre-cut Spruce Pine Fir Board 0.656 X 18 X 74
- 2 sanded Pre-cut Spruce Pine Fir Board 0.656 X 18 X 12 1/2
- Dremel with a wood cutting blade
- Electric Drill with Phillips screw-head
- 20 Phillips Black Phosphate Screws
- Philips Screwdriver
- Sandpaper or Sanding Sponge
- 1 Paint Brush
- 1 Sponge Brush
- 2 Cup Plastic Measuring Cup
- Paint Stick/Stirrer
- Rags
- Pencil
- Ruler
- 6 Shower Curtain Rings
- White Latex Paint
- Optional* Rust-Oleum Metallic Paint and Primer Spray Paint in Champagne Mist
- 2 Furniture Legs [we used metal legs by CsonkasCustomRustics
- Safety Glasses
- Safety Gloves
- Face Mask
STEP 1-4
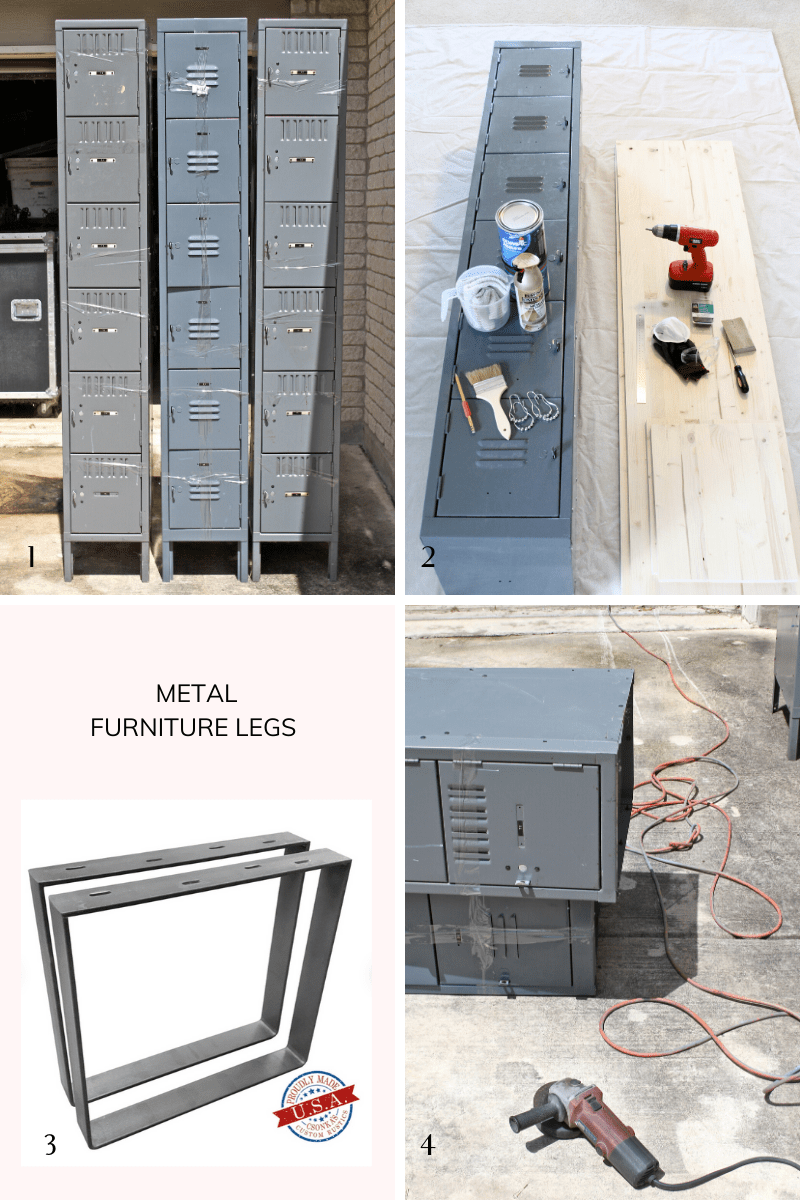
STEP 1: Make a plan on how you want the finished result to be.
STEP 2: Gather all of the supplies needed for this project. Prep the wood for painting by ensuring they are free of dust.
STEP 3: If you are making a work station or desk and you would like to have the same desk legs as above, you can order them here.
STEP 4: Using a Dremel, I removed the locker legs.
I then removed the tape I had put on the doors to keep the locker doors from flying open during transport. [That was not a good idea!] Tip* Don’t use sticky tape!
The tape was so sticky, it left a sticky residue! I had to use alcohol to remove it and there was nothing fun about it! 🙂 Then I cleaned the lockers with a damp rag and warm water inside and out.
STEP 5-8
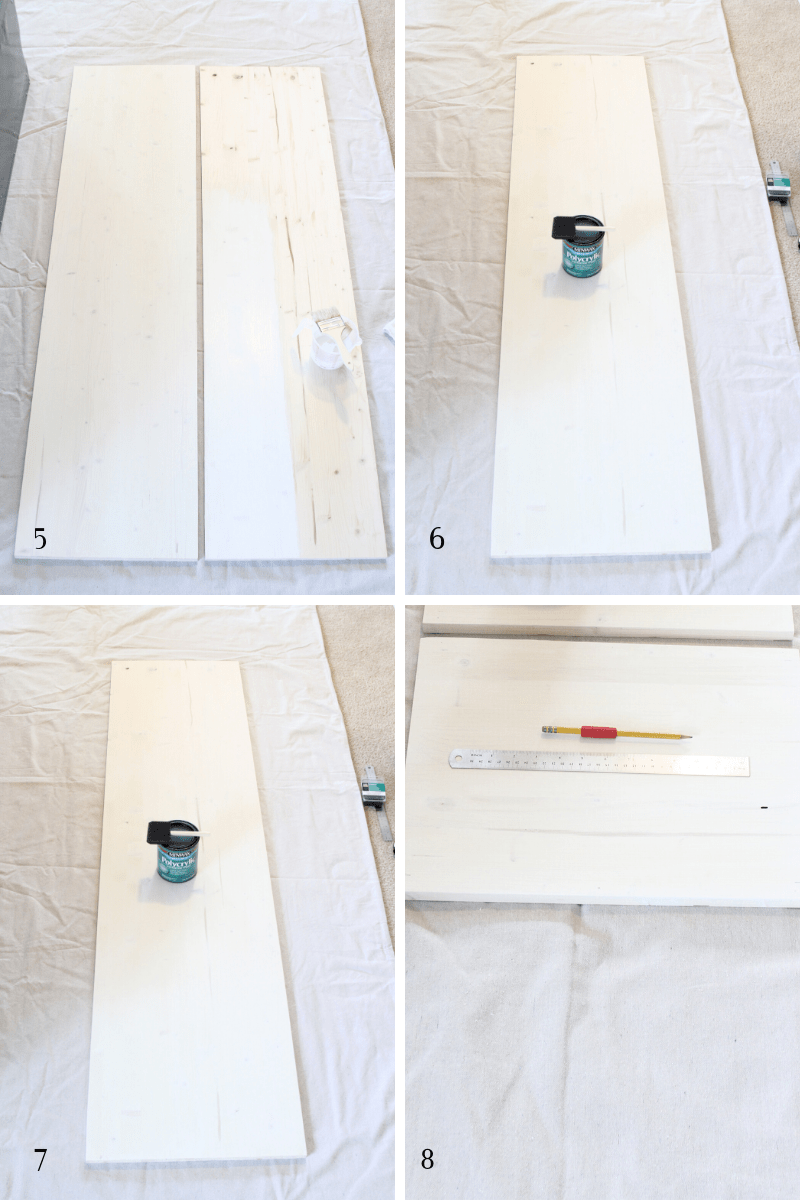
STEP 5: I did a whitewash on the pine boards.
Pour into the measuring cup 1 cup of white paint with 1 cup of water. Stir until well mixed.
Then paint one side of the board and the sides. Immediately after, with a clean rag wipe off the paint you just painted on the board. Take off as much as you need to to get the desired look you want.
Repeat this step with the other boards, one at a time.
As you can see in the photos above, I did a light whitewash treatment as I wanted to see the grain through the paint.
STEP 6: After all of the boards were completed and completely dry, I applied one coat of a protective finish, MINWAX with a sponge brush.
STEP 7: Apply one more coat of protective finish. Let dry completely. I waited for 3 days before I handled the boards to assemble them to the metal lockers.
STEP 8: Now that the boards have cured with the protective finish, I then got my ruler and pencil to measure and mark the placement of the desk legs and screw placements on the long boards.
STEP 9-11
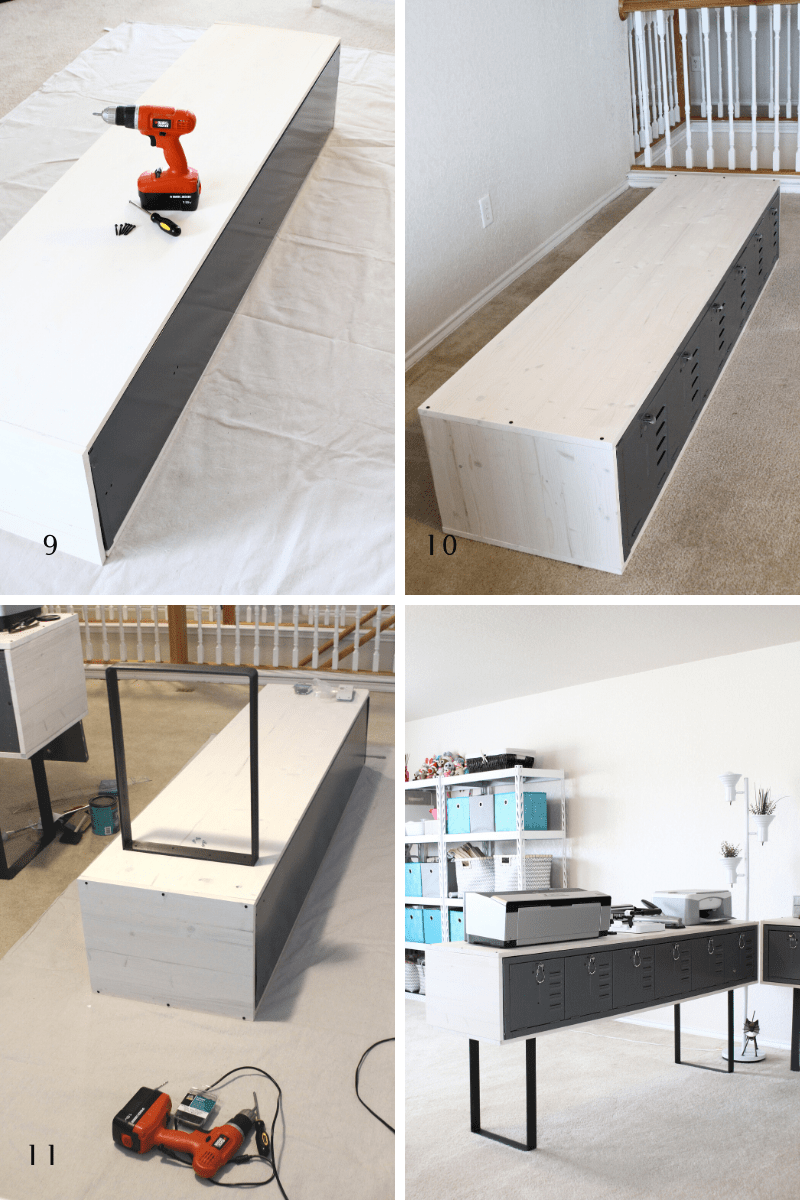
STEP 9: To encase the lockers, we placed one long board on the floor with the painted side facing downward, and positioned the lockers on top. Then we put the other long board on top of the lockers.
We then attached the small side-boards on each side, it was kind of like putting a puzzle together. But a super easy puzzle.
STEP 10: We drilled in the screws shown in image 10.
You may notice that the locker screws locations in the images 10 and 11 are different! Well, I was working on one locker and my hubs were working on the other, obviously, somebody [husband] wasn’t paying attention! LOL 🙂
STEP 11: Lastly, we attached the legs by drilling screws through the pre-drilled holes of the legs into the encasing.
That’s it! It was pretty simple to do and we love how they turned out.
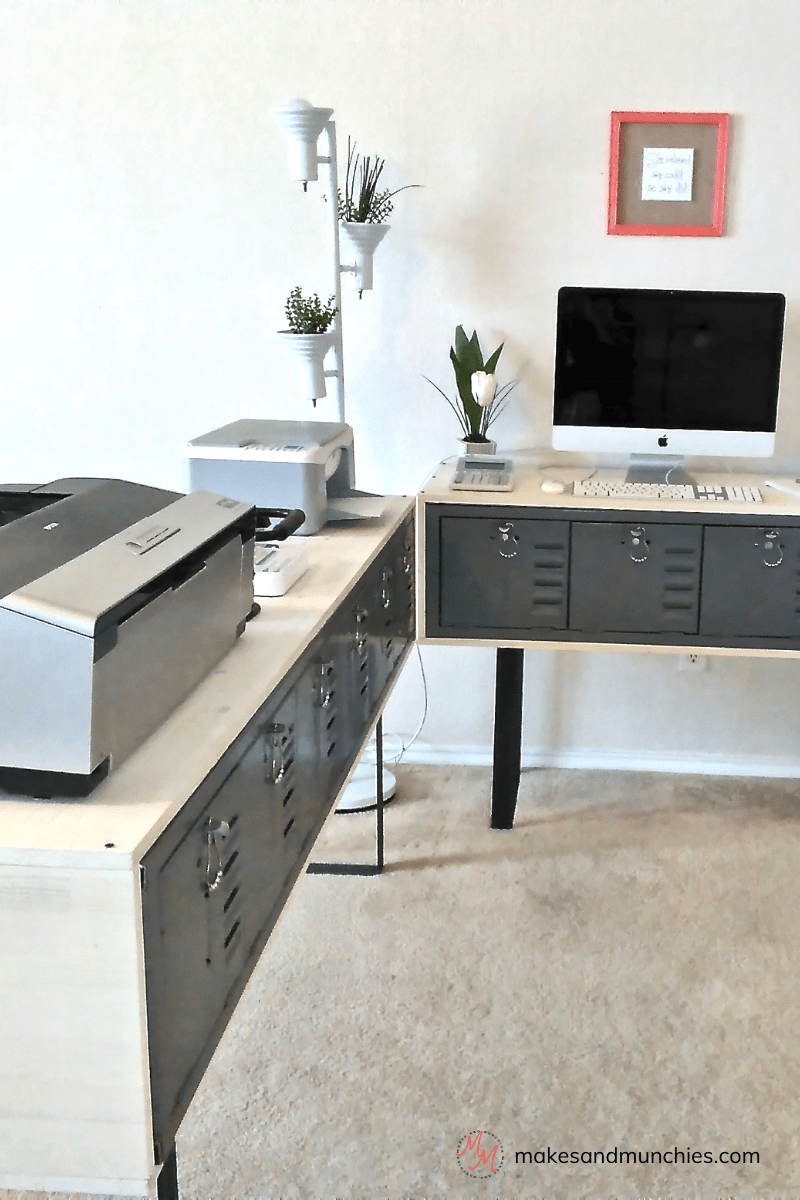
To keep the locker doors from popping open, I used shower curtain rings. For the desk, we left them their original color. But for the storage unit, we spray painted them champagne mist.
I thought that they added a nice touch. What do you think?
Also, just In case you were wondering why I didn’t add wood glue to the desk? I didn’t want the wood encasing to be permanent.
I’m constantly changing things up. If I decided I wanted to change up the look of my metal locker makeover, it would be simple and quick to dis-assemble if I chose to.
TAKEAWAY
After wanting to DIY metal lockers for the longest time, I can now finally say, I’ve done so.
The metal locker makeover project wasn’t difficult at all to do and the results are exactly what I wanted and more!
The only thing that took some time was the curing of the protective finish which took 3 days. It was well worth it.
Now, I have plenty of storage for my crafts and supplies for my studio. My studio is more organized and looks great too!
What do you think?
If you try this project, let me know in the comments below, share it, pin it and don’t forget to tag a picture #makesandmunchies on Instagram. I’d love to see the results!

Those turned out really nice! I would have never thought of using them horizontally!
Thank you so much, Michelle!